
|
Visual Infusion phlebitis (VIP) score |
||
| IV site appears healthy | 0 |
No signs of phlebitis OBSERVE CANNULA |
|
ONE of the following is evident:
|
1 |
Possible first signs of phlebitis OBSERVE CANNULA |
|
TWO of the following are evident:
|
2 |
Early stages of phlebitis REMOVE CANNULA OBSERVE SITE and RECORD VIP SCORE FOR 48 HOURS |
|
ALL of the following signs are evident:
|
3 |
Medium stages of phlebitis REMOVE CANNULA OBSERVE SITE and RECORD VIP SCORE FOR 48 HOURS ALERT MEDICAL STAFF TO CONSIDER TREATMENT |
|
ALL of the following signs are evident and extensive:
|
4 |
Advanced stages of phlebitis or start of thrombophlebitis REMOVE CANNULA OBSERVE SITE and RECORD VIP SCORE FOR 48 HOURS ALERT MEDICAL STAFF TO CONSIDER TREATMENT |
|
ALL of the following signs are evident and extensive:
|
5 |
Advanced stage of thrombophlebitis REMOVE CANNULA OBSERVE SITE and RECORD VIP SCORE FOR 48 HOURS ALERT MEDICAL STAFF TO CONSIDER TREATMENT |
Critical Care Vascular Access Device Care
Objectives
This clinical guideline details vascular access device management, encompassing:
- The minimum data requirements following insertion
- Daily checks
- Line Assessment
- Visual Infusion Phlebitis (VIP) scoring
- Aseptic Non-Touch Technique (ANTT)
- Care of consumables and line labelling
- PVC Removal
- Additional considerations for Arterial and Central Venous Cannulae
- Transducer sets
- Sampling
- Removal of Arterial and Central Venous Cannulae
Scope
This guideline covers the daily care of vascular access devices routinely used in deployed Critical Care; Peripheral Venous Cannula (PVC), Central Venous Catheter (CVC) and Arterial cannula (ART).
Audience
Critical Care Nursing and Medical Personnel.
Deployed ward personnel.
Initial Assessment & Management
Vascular access insertion
When vascular access devices are inserted, personnel are to ensure details of insertion including name of clinician inserting, date, time and any complications, are recorded in patient notes. For insertion of CVC the relevant LocSSIPs checklist must also be completed.
Daily checks
1. Consider vascular access requirement
-
- Is the line still required for drug or fluid administration, monitoring or sampling.
- If not required, remove.
- Lines that remain in place unused pose an infection risk (WHO 2024).
2. Visual Infusion Phlebitis (VIP) scoring
VIP scoring must be completed by the bedside nurse on every shift for all vascular access devices. This must be documented in the patients notes and the required action taken depending on the score. This is outlined in the submenu below.
Accessing devices
Hand hygiene
Hand hygiene is considered one of the most simple and effective ways to reduce transmission of infectious agents (NHS England 2025). Hand hygiene must be undertaken and gloves worn prior to insertion and when accessing all vascular devices.
Aseptic Non-Touch Technique (ANTT)
Use of ANTT has been recognised (NICE 2012) as best practice when accessing vascular access devices. Standard ANTT must be utilised for all vascular access devices, the steps of which are outlined below.
Use of needle free connectors
Needle free connectors (Claves) should be attached to each lumen of a PVC/CVC.
When needleless devices are used, the risk of contamination should be minimised by decontaminating the access port with either alcohol or an alcoholic solution of chlorhexidine gluconate before and after using it to access the system. These connectors should be changed routinely every 72hrs.
Three-way taps should only be used in Critical Care areas.
Consumables
Dressings
A sterile transparent semipermeable membrane dressing should be used to cover the vascular access device insertion site. This should remain in situ for the life of the cannula, provided that the integrity of the dressing is retained.
Sterile gauze covered with a sterile transparent semipermeable membrane dressing should only be used if the patient has profuse perspiration, or if the vascular access device insertion site is bleeding or oozing. If a gauze dressing is used:
- change it every 24 hours, or sooner if it is soiled and
- replace it with a sterile transparent semipermeable membrane dressing as soon as possible.
Administration set changes.
Administration sets for blood and blood components should be changed every 12 hours.
Administration sets used for Propofol should be changed every 24 hours.
If the infusion solution contains only glucose and amino acids, administration sets in continuous use do not need to be replaced more frequently than every 72 hours.
Line labels
All infusion lines should be clearly labelled to reduce drug administration errors. This is increasingly important when patients are receiving multiple continuous IV infusions. Where possible the colour coded pre-printed drug name stickers should be used to further increase visibility.
PVC Removal
- Wash hands, put on gloves and apron. Using ANTT remove any infusion lines and clamp claves. Remove the old dressing.
- Clean the skin surrounding the PVC with 2% Chlorhexidine in 70% alcohol and allow to air dry.
- Apply sterile gauze to the site.
- Withdraw the cannula and apply pressure to the site with a piece of sterile gauze until bleeding stops.
- Cover the site with a small piece of gauze and secure with tape.
- Document in the notes that the PVC has been removed, with the indication.
Advanced Assessment & Management
Additional considerations for Arterial Lines (ART) and CVCs
In addition to the routine daily checks detailed above for PVCs
- Ensure the tubing and transducer are not pulling on the cannula
- Ensure monitoring alarms are switched on
- Ensure the line is visible, if possible at all times
- Inspect the area distal and proximal to the insertion site for signs of
- Compromised circulation (ART): Cyanosis, blanching, delayed capillary refill time, decreased pulse, cool extremities.
- Displacement: Bleeding, redness, swelling, fluid leakage, blanching, pain or discomfort, loss of arterial waveform on the monitor.
- Infection: Swelling, redness, exudate, pain, temperature change.
ART / CVC Dressings
Dressing changes for these devices should be undertaken using aseptic technique. Decontaminate the insertion site and surrounding skin during dressing changes using chlorhexidine gluconate in 70% alcohol and allow to air dry. Change the transparent semipermeable membrane dressing covering the site every 7 days, or sooner if the dressing is no longer intact or moisture collects under it.
DMS modules contain two types of ART cannula:

Vygon leader cath ART and all CVC must be sutured securely using the anchor points on the device at the time of insertion. If sutures are not in place this must be completed by a trained individual as soon as possible. Baxter flow switch are not routinely sutured in place but can be if required.
ART and CVC Transduction
To monitor Invasive Blood Pressure and Central Venous Pressure a transducer set, pressure bag and pressure monitoring cable is required to connect to the patient monitor. To ensure accurate monitoring data is obtained, the following steps should be undertaken to set up the transducer circuit:
- Using a 500 mL bag of 0.9% Nacl, spike it with the transducer administration set, and secure in a pressure bag and inflate the pressure bag, flush the 0.9%Nacl through the set removing all air from the tubing, paying close attention to the transducer and flush ports. The transducer sets used in the DMS are usually double transducers. The entire set must be flushed through even if you are only using a single transducer for either CVC or ART. The 0.9% Nacl must be prescribed and double checked unless a PGD is in place.
- Once flushed through and all air is removed, fully occlusive bungs must be used on all connection ports.
- Pressurise the bag to 300 mm Hg and set it at a flow rate of 1 to 3 mL/hr. The elevated pressure counteracts systemic arterial pressure, preventing blood contamination of the transducer. Subsequently, invert the bag and fast flush to eliminate any remaining air bubbles.
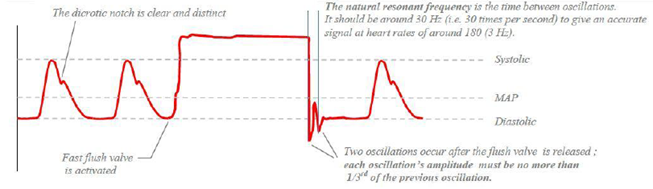
- Connect the transducer to the monitor and conduct a square wave test by fast flushing the ART line to observe changes in the arterial waveform.
Positioning of the transducer varies depending on patient position. For patients in the supine or prone position, the transducer is typically placed at the level of the right atrium or the midaxillary line in the fourth intercostal space. For seated patients, considering the lower cerebral pressure compared to the heart level, the transducer should be positioned at the level of the tragus.- Zero the transducer and monitor, close the line off to the patient, open it to air, and press the "zero" button on the monitor.
- Before monitoring pressure, close the port to the air and open it to the patient. Connect the patient's catheter and flush it to clear any blood.
- Check the monitor for a good arterial waveform with prominently displayed arterial blood pressure and mean values.

- Clearly label the ART and CVC with the appropriate line flags
Re-calibration
The transducer must be re-calibrated:
- Following insertion
- At the beginning of every shift
- Whenever the patient’s position is changed
- When the transducer set is changed
- If there is any doubt concerning the displayed recordings
NEVER administer medications via ART cannula
ART Cannula must ALWAYS have a transducer attached.
CVC may not require a transducer. If a CVC transducer is not used, ports that are not in use should be flushed with 10mls 0.9% NaCl daily. Any blocked lumens should be clearly labelled.
Sampling via ART/CVC
Sampling should be undertaken by personnel who have received training pre-deployment. There may be a requirement to upskill additional staff in the deployed setting and training for this should be provided with the oversight of the deployed HoD.
Removal of ART cannula
Accidental displacement of the arterial cannula will require immediate application of pressure to the site for 5-15 mins or until bleeding has stopped
ART cannula should be removed when no longer required, or if there are complications or contraindications. Removal should be undertaken by appropriately trained personnel.
- Wash hands, put on gloves and apron. Using ANTT if the ART is a Flow switch turn off device, release the pressure from the pressure bag and disconnect the transducer set. If the device is a Vygon leadercath this is free flowing so use a bung to cap off the end or turn off the three-way tap and disconnect the transducer set higher up.
- Remove the old dressing and any retaining sutures.
- Clean the skin surrounding the ART cannula with 2% Chlorhexidine in 70% alcohol and allow to air dry.
- Apply sterile gauze to the site.
- Withdraw the cannula and apply pressure to the site with a piece of sterile gauze for 5 minutes. Ensure that the circulation to the hand or foot is maintained.
- Check to see if the bleeding has stopped if it hasn’t apply pressure for a further 2- 3 minutes before checking again. Continue until bleeding has ceased.
- Cover the site with a small piece of gauze and sterile transparent semipermeable membrane dressing.
- Observe the site regularly for bleeding or haematoma.
- Document that the ART cannula has been removed.
- If an ART is removed because of concerns about the circulation distal to the insertion site, document this and highlight to ensure that future attempts at cannulation avoid the site. If perfusion does not return within a few minutes of removal this must be brought to the attention of the consultant.
Removal of CVC
Removal should be undertaken by appropriately trained personnel
- Position patient in Trendelenburg position (supine, head slightly lower than feet)
- Wash hands, put on gloves and apron. Using ANTT remove any infusion lines/transducer set from CVC and clamp the lumens. Remove the old dressing.
- Remove gloves and perform hand hygiene, apply sterile gloves.
- Clean the skin surrounding the CVC with 2% Chlorhexidine in 70% alcohol and allow to air dry.
- Remove the skin suture using a stitch cutter.
- Cover the site with sterile gauze.
- Awake non ventilated patient: Ask the patient to perform Valsalva (full inhalation and hold their breath). While the patient is holding their breath. Apply gentle steady pressure to the insertion site and withdraw the CVC in a slow gentle motion.
- Ventilated patient: remove the CVC in the same manner but during the expiratory phase of ventilation.
- Maintain pressure on the sterile gauze covering the site for approx. 5 minutes after CVC removal. When the bleeding has stopped cover the site with sterile gauze and sterile transparent semipermeable membrane dressing.
- Check the CVC tip is intact. If there are any concerns of patient infection the line tip (5cm) can be cut with sterile scissors, put in a white top sample pot and sent to the deployed lab for MC&S.
- Observe site regularly for bleeding dressing should remain in place for 72hrs.
- Document the CVC has been removed.
Prolonged Casualty Care
During Large Scale Combat Operations supply chains may be disrupted and access to cleaning solutions, replacement dressings and consumables may be limited. When operating under these conditions every effort should be made to keep vascular access devices clean, secure and maintain ANTT where possible, but a pragmatic decision on extending duration that lines remain in should be taken. Concerning central access, if clinician is appropriately skilled, thought should be given to obtaining subclavian access, given reduced risk of contamination and displacement.
In prolonged casualty care and especially prolonged extrication/transfer consider maintaining central access as a more reliable form of IV access which is less prone to accidental displacement. Balance the risk against the risk of infection and risk of inadvertent loss of IV access on a case-by-case basis.
